Step-by-Step Installation Guide for the Fleck 5600SXT Water Softener
Installing the Fleck 5600SXT water softener is a straightforward project for any competent DIYer, though it requires careful planning and the right tools. This guide covers the complete process, from preparing your site to programming the digital valve, so you can enjoy soft water without calling a plumber. We’ll focus on the practical steps that save you time and prevent common mistakes.
What Tools and Materials Do I Need for the Fleck 5600SXT Installation?
Before you start, gather everything you need to avoid mid-project runs to the hardware store. The Fleck 5600SXT requires specific tools, not just standard plumbing gear, because of its bypass valve design and digital controller.
Essential Tools
- Adjustable wrench (two, for tightening nuts)
- Pipe cutter or hacksaw (for copper or PEX)
- Phillips head screwdriver
- Plumber’s tape (PTFE)
- Level (to ensure the tank sits perfectly upright)
- Bucket or towels (for minor spills)
- Electrical multimeter (to verify power, optional but recommended)
Materials Checklist
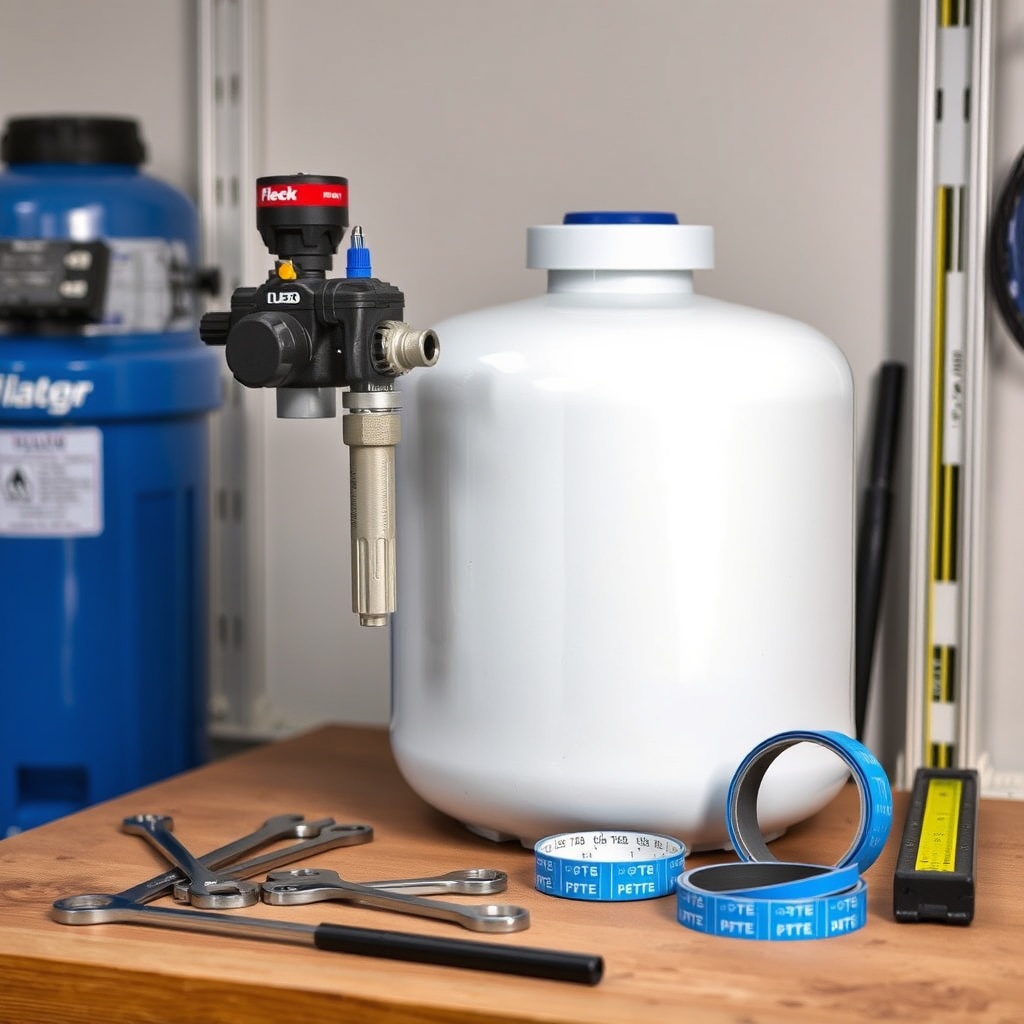
- Fleck 5600SXT valve assembly with bypass (check the box—sometimes shipped separately)
- Fiberglass or resin tank (typically 10×54-inch or 9×48-inch)
- Brine tank (usually separate, rectangular)
- 1-inch compression fittings or brass sweat adapters (depending on your plumbing)
- Drain line tubing (3/8-inch ID polyethylene)
- Overflow brine line tubing (same spec)
- Brine safety float kit (inside brine tank)
- 12V AC transformer (plugs into standard 110V outlet)
Site Prep
Place the system at least 10 feet from the water heater to prevent thermal transfer that can waste salt. The floor must be level and capable of supporting 200-300 pounds when the tank is full of resin and water. Allow 1-2 feet clearance above the valve to access the display and buttons.
How Do I Connect the Bypass Valve and Plumbing Lines?
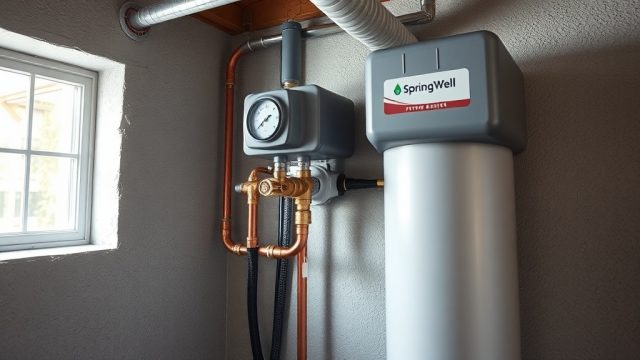
The bypass valve is the heart of the installation. The Fleck 5600SXT uses a built-in 1-inch NPT bypass that lets you isolate the softener for maintenance without shutting off water flow to your house. Connect it correctly the first time.
Step 1: Install the Bypass Valve
- Apply PTFE tape clockwise to the 1-inch male threads on the valve’s inlet and outlet ports (four wraps).
- Screw the bypass body onto the valve, turning the brass nuts by hand, then tighten with a wrench—do not overtighten (1/4 turn past hand-tight is plenty).
- Rotate the bypass handle to “bypass” position (handle perpendicular to pipe direction) while you connect the plumbing.
Step 2: Connect Supply and Outlet Piping
Use 1-inch copper or PEX for best flow rates. For copper, sweat on adapter fittings before connecting to the bypass. For PEX, use push-fit connectors (like SharkBite) or compression rings.
- Identify the inlet (water coming in, usually from the right when facing the valve) and outlet (going to the house, left side).
- Install a shut-off valve before the softener at the inlet side (recommended for future service).
- Connect the outlet line to the house plumbing, but do not turn on water yet.
Step 3: Install the Drain Line
- Attach 3/8-inch drain tubing to the “drain” port on the valve (blue cap or labeled).
- Route the tubing to a floor drain or laundry sink, maintaining a 1/4-inch per foot downward slope.
- Leave a 2-inch air gap above the drain—this prevents back-siphonage. Secure tubing with a cable tie.

How Do I Set Up the Brine Tank and Connect It to the Valve?
The brine tank stores salt and supplies the softener with concentrated brine during regeneration. Setting it up right ensures consistent salt consumption and avoids salt bridging.
Brine Tank Assembly
- Place the brine tank next to the resin tank (within 6 feet of the valve, as the brine line is pre-cut at 6 feet).
- Install the safety float inside the brine tank: push the assembly into the 1/2-inch hole near the top of the tank wall.
- Connect the 3/8-inch overflow tube from the safety float to a drain (same air gap rule applies).
Connecting the Brine Line
- Locate the brine line connection on the Fleck 5600SXT valve (the 3/8-inch compression fitting, often with a black nut).
- Slide the provided polyethylene tube onto the fitting, tighten the nut.
- Attach the other end of the tube to the brine well inside the brine tank (the float assembly has a stem that fits the end of the tube).
- Fill the brine tank with two or three bags of salt (40-60 lbs total) to sink the float—don’t use more than that initially.
A common mistake is overloading the brine tank. The Fleck 5600SXT works best when salt levels stay below the water level line visible inside the tank. Too much salt can cause “bridging,” where salt crust blocks water absorption.
For more on salt efficiency, read our guide Fleck 5600SXT Salt-Based Efficiency: How Much Salt Does It Really Use?
How Do I Program the Fleck 5600SXT Digital Controller?
The digital display and buttons on the Fleck 5600SXT let you set hardness, capacity, regeneration time, and salt dosage. Rushing this step leads to wasted salt or hard water breakthrough. The factory defaults (usually 20 grains, 2 AM regeneration) rarely match your water chemistry.
Basic Setup Steps
- Press and hold the “SET” button for 5 seconds until the screen shows “HARDNESS.”
- Use the + and – buttons to enter your water hardness in grains per gallon (gpg). Have a test kit result ready—if you don’t know, assume 10 gpg for a typical well in limestone regions.
- Press “SET” to advance to “CAPACITY” (cubic feet of resin). For a 1.5 cu. ft. tank (most common with the 5600SXT), set to 40,000 grains. Adjust for larger or smaller tanks.
- Next is “DAY OVERRIDE”: set to 7 (forces regeneration every 7 days even if capacity not reached, prevents bacteria growth).
- Set “REGEN TIME” to 2 AM (default) unless you prefer 3 AM for later water use.
- Leave other settings (salt efficiency, salt fill time) at factory defaults for first week, then fine-tune based on salt usage.
Advanced Settings
For “SALT EFFICIENCY” (SET after capacity), the Fleck 5600SXT defaults to “1.5” (meaning 1500 grains per pound of salt). You can increase to “2.0” for better salt economy, but this lowers regeneration capacity slightly. I recommend starting at 1.5 for reliability, especially in high-hardness water.
The valve also has a “QUEUE” mode that delays regeneration until you manually start it. Avoid this unless you want unpredictable service.
If the controller shows error codes later, refer to our Fleck 5600SXT Error Codes: Quick Troubleshooting Guide.
What Steps Are Involved in the Initial Start-Up and De-Winterization?
After plumbing and programming, you must “de-winterize” the system—a process that purges air from the resin tank and primes the brine line. Skipping this can damage the valve or cause brine to overflow.
Step 1: Slow Fill
- Open the main water supply valve very slowly (1/4 turn). Listen for hissing as air escapes from the softener’s drain line. Water will sputter—that’s normal.
- Allow water to flow into the tank for 5 minutes, then fully open the main valve.
- Close a nearby faucet that you opened earlier (to relieve air) after the water runs clear.
Step 2: Initiate Manual Regeneration
- Press the “REGEN” button on the valve (holds for 3 seconds) to start a manual regeneration cycle.
- The valve will advance through “Backwash” (10-15 minutes), “Brine Draw” (50-60 minutes), “Rinse” (5 minutes), and “Brine Refill” (15 minutes).
- During Brine Draw, check that the brine tank is drawing water—you’ll see water level drop in the brine well. If not, re-check the brine line connection or purge air by cycling again.
- After the cycle completes (about 2 hours total), check for leaks at every fitting. Tighten if necessary.
During the first week, the softener may need two to four regenerations to fully condition the new resin. Your initial salt usage will be higher—that’s normal. After that, it stabilizes.
For performance benchmarks, check our Fleck 5600SXT Hard Water Test: How It Performs in High-Grain Water.
What Common Installation Mistakes Should I Avoid?
Even experienced DIYers mess up on these three points. Avoiding them saves hours of rework and keeps your system running smoothly for years.
| Issue | Why It Matters |
|---|---|
| Overtightening bypass nuts | Strips threads, causes slow leaks. Hand-tight plus 1/4 turn max. |
| No air gap on drain line | Can back-siphon contaminated water into the softener, violates plumbing code. |
| Incorrect hardness setting | Underestimating hardness = hard water; overestimating = wasted salt and water. |
| Bypass valve in bypass during start-up | Prevents water from reaching the house. Always double-check handle position after installation. |
Another overlooked detail: the brine tank must be on a level surface. If tilted, the safety float may not close properly, causing an overflow. Use a shim if needed.
What Owners Say About the Fleck 5600SXT Installation
People who’ve done this install share two consistent observations. First, the digital controller with its button interface is much easier to program than the old dial-style timers. Second, the bypass valve’s built-in design—rather than separate add-on—is appreciated because it simplifies plumbing.
One owner noted on a forum that the drain line connector on the valve can be fragile if overtightened, so he recommends hand-tightening plus a dab of PVC-safe cement instead of over-twisting the nut. Another reported that the manual regeneration process (Step 2 in Section 4) worked perfectly on his second attempt after realizing he hadn’t fully opened the supply valve during the initial fill. A third mentioned that the brine line at the tank end sometimes pops off if not pushed all the way onto the float stem—he used a cable tie to secure it.
Frequently Asked Questions
1. What size pipes do I need for the Fleck 5600SXT?
The valve has 1-inch NPT threads—use 1-inch copper or PEX main lines. For houses with 3/4-inch copper, you can use reducing adapters, but expect slightly lower flow rates during regeneration (which is fine).
2. Do I need a water test before installation?
Yes—strongly recommended. At minimum, test for hardness (gpg) and iron content (ppm). High iron (over 5 ppm) may require a pre-filter or media beyond standard resin. A cheap test kit from a hardware store is adequate.
3. Can I install the Fleck 5600SXT outside?
No. The valve and electronics are not weatherproof. Freezing temperatures will crack the resin tank. Install in a basement, garage (above freezing), or utility closet—never outdoors.
4. How do I know if my brine tank is too full of salt?
Salt level should not exceed the water level line inside the brine tank (usually 6-8 inches from the top). Overfilling can block the brine well and prevent salt dissolution. Keep salt below this line for reliable operation.
5. The display shows “H2O” (system is running)—does that mean a problem?
No—this is the normal “water flow” display, indicating the softener is in service. It simply means water is passing through the valve. It’s not an error code.
6. Why does my softener use salt faster than expected in the first week?
New resin needs initial conditioning: the first few regenerations may consume 1.5-2 times the normal salt amount. After 2-3 cycles, usage settles to the programmed rate (typically 0.4-0.6 lbs per regeneration for standard settings).